Introduction to Voicemeeter with a Banana
What is Voicemeeter Banana
Voicemeter Ba na na, na na na na, sing with me! Unless you are streaming or making a youtube video as that could result in a DMCA! Joke aside, Voicemeeter Banana, what is it? Voicemeeter Banana is the second iteration of Voicemeeter, an audio mixing software that allows advanced audio mixing, which is also provided free. You can download voicemeeter by visiting their website.
Voicemeeter Banana comes with three hardware inputs, two software digital inputs, and three hardware outputs. For reference, hardware inputs are typically hardware devices pushing audio into the computer, such as microphones, line inputs, and other things like that. The software or digital input is a driver on the system that allows audio to be pushed to it, they help with threading audio around. Hardware outputs are your headphones, speakers and can also be a digital audio driver.
Installing Voicemeeter Banana
I think the best way to explain Voicemeeter Banana is to set it up and explain along the way. This gives us a more hands on approach which we can test actively. I will cover setting up Voicemeeter in this way: Hardware Outputs, Digital Inputs, then Hardware Inputs. My reason for this is it is hard to test if we have any of the inputs set up but don’t have proper outputs set up. So please install Voicemeeter Banana and the free Virtual Audio Cable that comes with it, you may be required to restart your computer.
Location of Virtual Audio Cable in Voicemeeter after installation: ‘C:\Program Files (x86)\VB\Voicemeeter’
Setting up Voicemeeter Banana
Please open Voicemeeter Banana.
Saving Settings, Loading Settings, Resetting settings
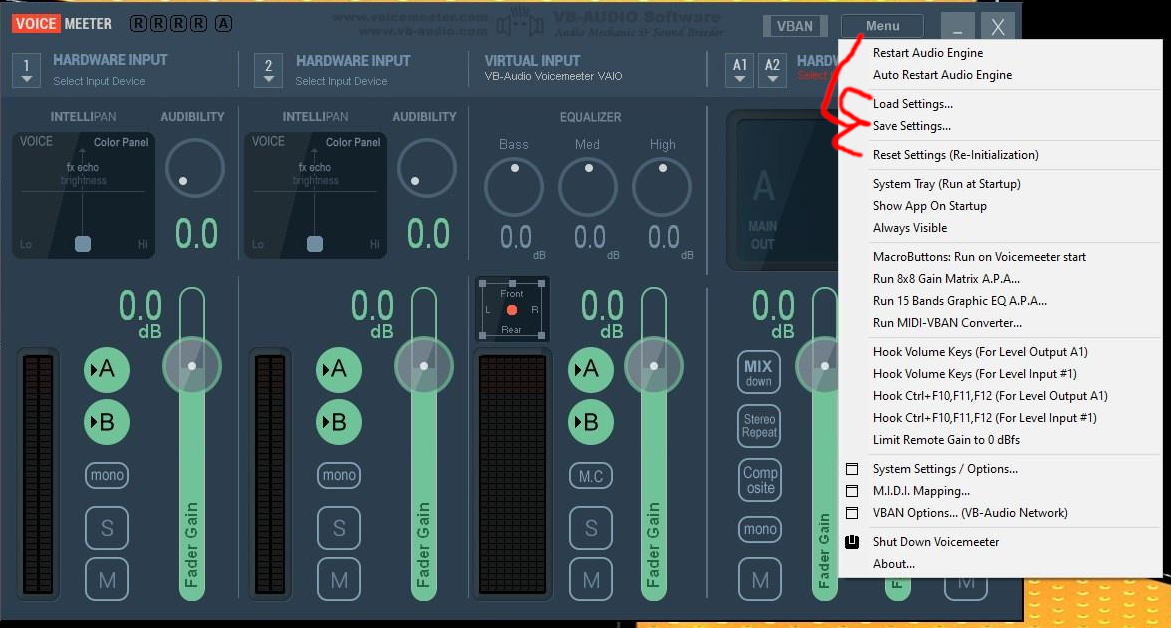
Something that typically gets skipped in other Voicemeeter coverage that I’ve seen is the ability to save settings. At any point you can save your current settings of Voicemeeter by going to Menu→Save Settings. This saves a settings file on your computer you can then Menu->Load to load any saved settings from just a file even on other devices should you want to transfer your settings to another device. If at any point you feel lost and want to restart the setup, you can go to Menu→ Reset Settings (Re-Initialization) and this will make Voicemeeter appear as if you had just installed it, blank with nothing set up.
Audio outputs
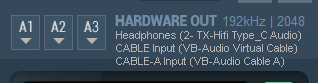
The Hardware Outputs section in the top right should have A1, A2, A3 with a triangle beside them. Each one of these have a selectable menu for our output devices. Each input device has a toggle-able setting for us to push audio to each individual output device, which will get better explanation when we get to inputs. For now, click on A1 and select your headphones. Click on A2 and select the virtual audio cable.
Your A1, A2, and A3 section should look a little something like this:
Below the hardware output selection you will see a bunch of vertical bars, for now we will leave these alone until we have audio pushing through them. For that, we will start by pushing computer audio to them through a digital inputs.
Digital Inputs and Windows Audio
For digital inputs we will be looking at the middle columns of Voicemeeter Banana which should look a little something like this:
To set our Windows Default Audio to push through these digital inputs we need to open Windows Sound Settings by right clicking on the speaker icon that adjusts our audio in the task bar. After right clicking select ‘Open Sound Settings’, (alternatively you can open the windows start menu and type ‘sound settings’ and it should show up for you to open). You should see a window that with these:
Sound- Choose your output device: Select VoiceMeeter Input (VB-Audio Voicemeeter VAIO) as the default

After setting VB-Audio Voicemeeter VAIO as our default output device pull up Voicemeeter Banana. In the middle under the Voicemeeter VAIO section we should see the audio levels rising and lowering if you play sounds on our computer. Do you? Great! If not? Try again! Also, if you happen to be having any issues please don’t hesitate to pop into the Library discord for assistance. Link to discord here: StreamSounds Discord Server
You may, or may not, be able to hear these right away, if not just take a look in the column down at the A1, A2, A3 and select the ones for the headphones. If you set up along with the tutorial it should be A1. At this point you should be able to hear the audio going through your headphones which will show in the bottom right level bars under the A1 column.
Bottom right Hardware Outputs audio with audio pushed through.
You will notice this has a bunch of different options, including a mono toggle and a mute toggle! When the mono toggle is activated, it makes all stereo input to that output turn into mono output and split the same combined signal over both the left and right channels evenly. The mute toggle will mute the output to that device explicitly. At this point you should be hearing your computer audio going through and being pushed to your headphones.
Hardware inputs and microphone
Are you ready to set up a microphone? I am! Alright, so microphones. In the far left section, Hardware Inputs, there should be a ‘Select your device’ listing. Click this and you should get an option between a bunch of different things. Select the WDM version of your microphone for now. We will discuss the different versions of the drivers in a different article.
Picture of a microphone selected in Hardware Inputs section:
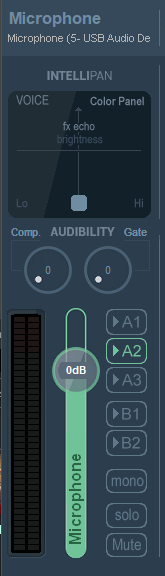
You will now notice, if your microphone is unmuted, it should be moving the audio bar under that device listing. If you want to hear what is going through the microphone you can push the A corresponding to your headphones. If you set them up following this tutorial then they should be A1. Can you hear yourself? Good! If not, make sure your microphone doesn’t have a physical mute toggle on it and that it isn’t muted. If that isn’t the issue, you can also check windows sound settings under Recording Devices to see if the input level is too low. Windows can sometimes default audio levels on updates.
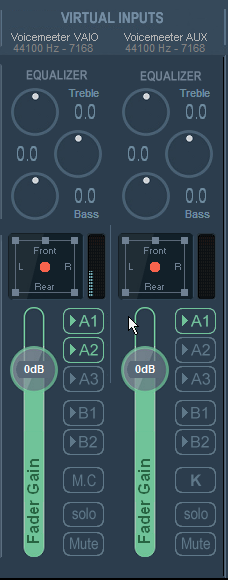
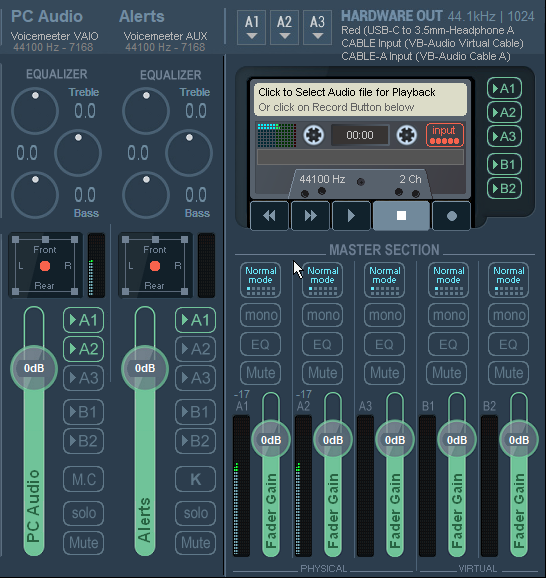
You may have noticed we haven’t done anything with A2 or A3 yet. If you followed the tutorial we will have set A2 Hardware Output to a Virtual Audio Device. If you select A2 on the Voicemeeter VAIO input, and the Microphone input, you will see down in the right corner the audio level bar for A2 moving. The reason we set up this Virtual Audio Devices is to pull into OBS.
Picture of Audio bars moving after A1 and A2 set:
OBS Audio and alerts
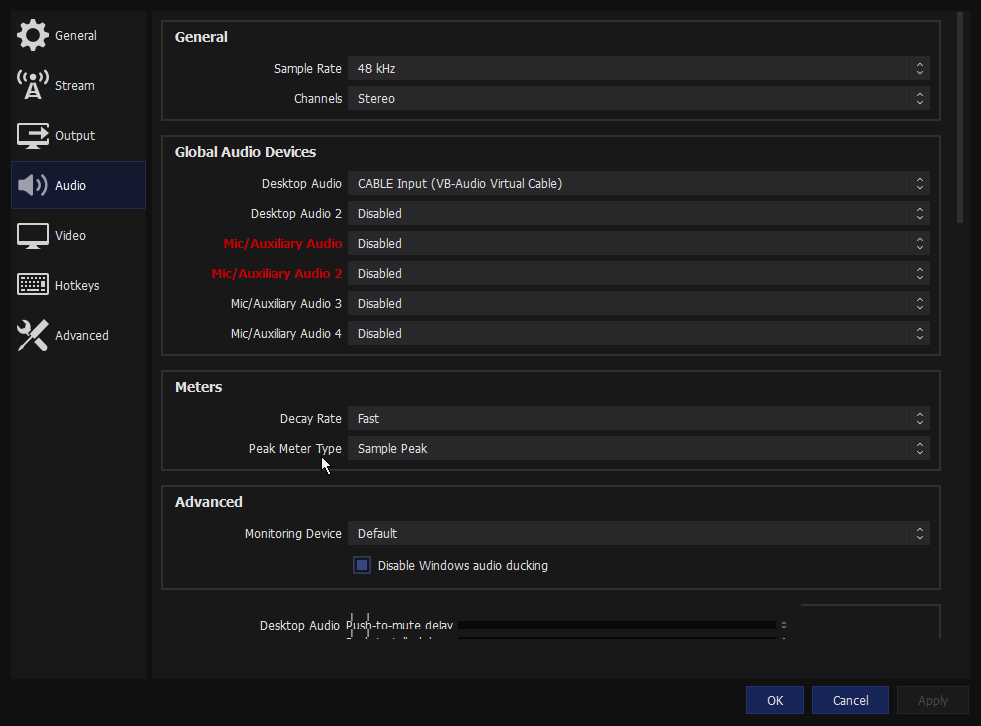
Lets get our audio into OBS! Open OBS and go to Settings → Audio. For this all we do is set Desktop Audio to Cable Input (VB-Audio Virtual Cable). Disable everything else since we are using Voicemeeter Banana to route and mix all our audio to one place.
It should look a little something like this:
You might ask, what about alerts? I’m going to wager your alerts are being pulled into your OBS via browser source. You set these up your normal way and when you do make sure to set Control Audio Via OBS. This will give you an Audio level bar in the Audio Mixer portion of OBS.
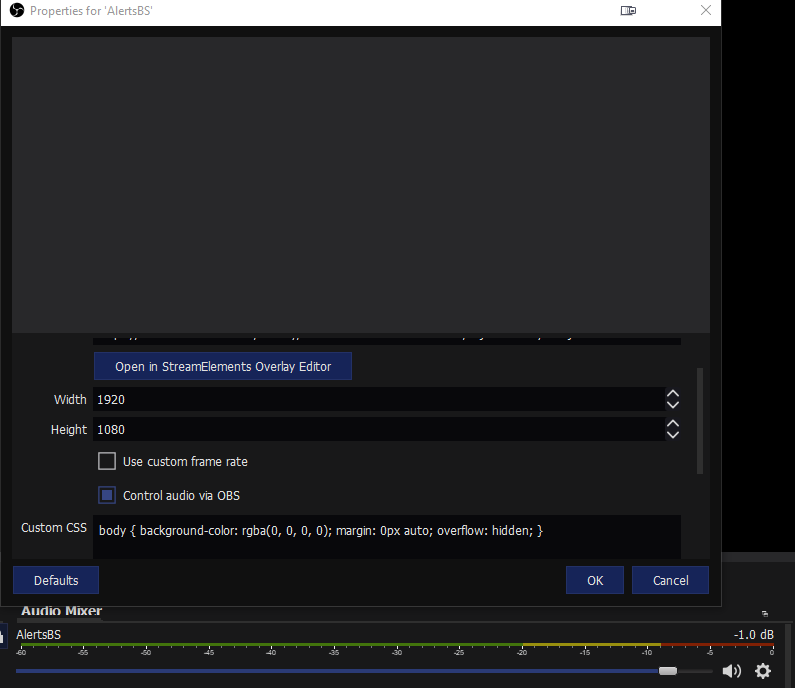
You will notice a cog options menu icon beside the specific Audio source in the Audio Mixer. Click this and you will see a menu and something that reads Advanced Audio Properties which opens a window like this:
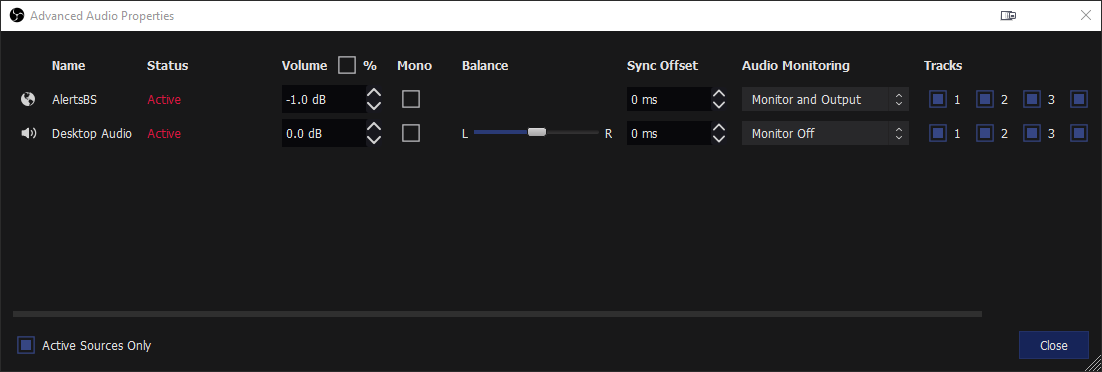
Select Monitor and Output for the Alerts you want to hear.
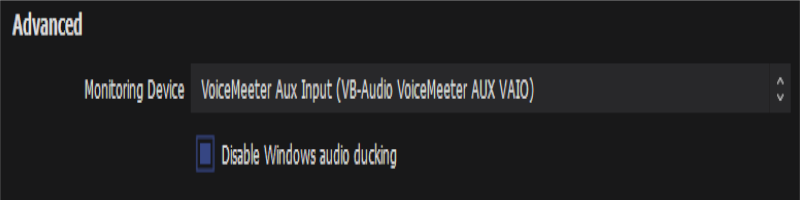
Then go into Settings→Audio→Advanced section→Monitoring Device: Set this to VoiceMeeter Aux Input (VB-Audio VoiceMeeter AUX VAIO):
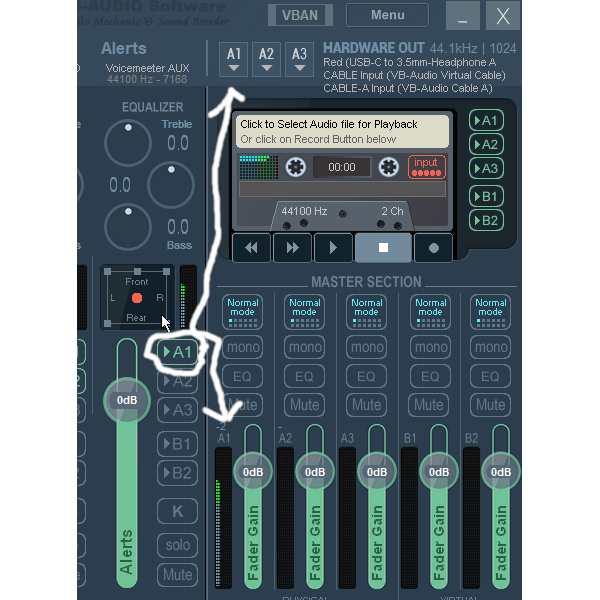
Now go to your Voicemeeter Banana application and test some Alerts. You should see the Voicemeeter AUX audio bouncing around. Since we are pulling the audio into OBS via Browser Source and both Outputting and Monitoring. All we need is to push this audio to our headphones so we can hear when things happen. So select whichever A# is your headphones and test again to make sure you can hear it.
Image of Voicemeeter AUX being pushed to headphones and not back into the virtual audio driver/device going into obs so the stream doesn’t get echo’d alerts.
I believe this should cover everything to get started with Voicemeeter Banana. However, if you have any trouble please join the StreamSounds Discord Server to get the help you need with setting up Voicemeeter or if you have any questions about audio, audio mixing, microphones, OBS, streaming, and other things. We would love to have a chat about things and look forward to learning, teaching and assisting in many different things. Not just audio! Just like a library is full of random knowledge collected, we wish to grow our own knowledge and share it with others. So please come join us in the sharing.